There are many steps to consider when preparing to decorate or print onto silicone rubber products or components. When printing on silicone using silicone ink, a permanent homogeneous bond is created for the life of your product. Once the frame material, design and mesh have been picked for the job requirements, the next step in the process is to attach the mesh to the frame.
Mesh Attachment

Preparation
In the next step, the mesh needs to be properly prepared to receive the image to be printed. Degreasing the screen of all dirt or oil left over from the manufacturing process is important to ensure adhesion of the stencil. Once the mesh has been degreased and completely dried, the stencil and artwork can be placed on the screen. The stencil is made by blocking off the negative image of the design to be printed on silicone rubber products or components, thereby creating the open places where the ink will flow onto the substrate. This can be achieved one of two ways; by capillary film or a liquid emulsion. Because of the fine details and resolution required in printing on silicone rubber, the capillary film provides more control over thickness and excellent consistency which, in turn, provides a cleaner, more detailed image. Capillary films come in many thicknesses, depending on the job needs, mesh material and count being used.
Exposure
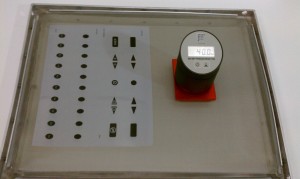
The artwork that will be exposed on the image can be printed on transparency paper as long as the area you don’t want exposed, which is the area you want the ink to pass through, is opaque so that light can’t pass through. The screen is then placed on a light table and the exposure lamp’s distance is adjusted, depending on the thickness of the capillary paper. The duration of exposure also depends on the thickness of the film, as well as the intensity of the ultraviolet (UV) exposure. Actual exposure times vary from 3 to 6 minutes and should result in full exposure.
Once the image has been exposed, the screen is washed with water to clean out the unexposed film, revealing the image to be printed. Blockout is a colored chemical used to fill in any gaps around the outer edges of the screen or in pinholes that might exist. Once dry, the screen is ready for full production.
There are many advantages to building screens from scratch. Multiple artworks can be printed onto one screen. If the design changes, a quicker turnaround time is achieved. Also helpful is the ability to troubleshoot problems quickly and easily and the ability to reclaim screens for future uses. At SiTECH, all aspects of our decorating processes are performed in-house. Printing on your silicone rubber product will also increase the functionality and performance. It can also make your product more visually appealing to attract potential customers. From our custom silicone rubber keypads to our proprietary silicone inks and sprays, we can fulfill your product needs and help it stand out from the competition.


